AIX – Client Virtual Disk Allocation by Using MPIO Technology:
On the VIO Server, the rootvg, virtual client rootvg and virtual client datavg are sliced from the internal SAS disk which passing the I/O through the same SAS card. Due to this, the SAS card gets more loads which is degrading the performance of client servers. We Limitation to have number SAS card in one physical frame (4 CEC maximum 4 cards, if RAID adapter is present in I/O expansion it would be there otherwise we can use SAS spliter cards to split SAS raid controller in-order to increase RAID controller ).
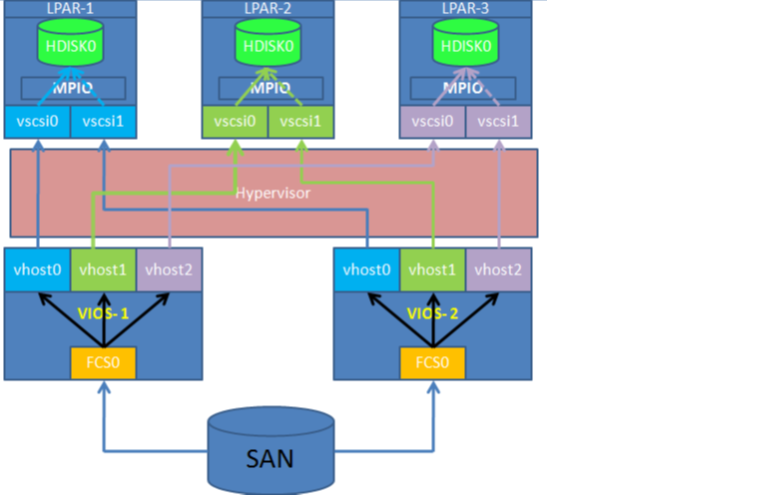
We would be adding one Fiber Cards in each of the VIOSERVERS (currently we are adding only one FC card to each vioservers, depends upon the load and data volume, another FC card will be added). Primary SAN switch Fiber Card should be connect in to the primary VIOSERVER and Secondary SAN switch Fiber Card should be connect to Secondary VIOSERVR. We would require the SDDPCM device drivers to be installed on the VIOSERVER for better communication between SAN and VIO servers. Refer the below diagram for MPIO Understanding.
Prerequisite to configure the MPIO
Everyone expects 100% redundancy and uninterrupted services and continues availability of infrastructure. To make that sure keep some consideration while planning/configuring.
1) Always keep two Fiber Channel Adapters on each VIOSERVERS to ensure redundancy part from host perspective.
2) If possible allocate Fiber Channel Adapters from different CEC or I/O Drawers.
3) Discuss with storage team and make sure that each VIOSERVER connected with different SAN switches.
4) Setup Fiber Channel adapter tunable.
1. Avail the LUN IDs for the assigned disks from the Storage Team;
Note:- Need to give the estimated size of the LUN.
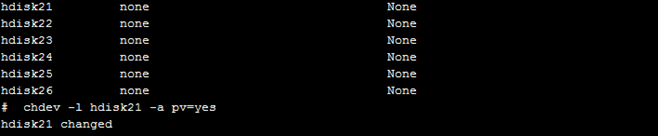
2. Generate the PVID for the newly assigned LUNs
#chdev -l hdisk# -a pv=yes
(-a is for attribute)
(pv=yes —> turns on physical volume id for the particular disk)
Example :-
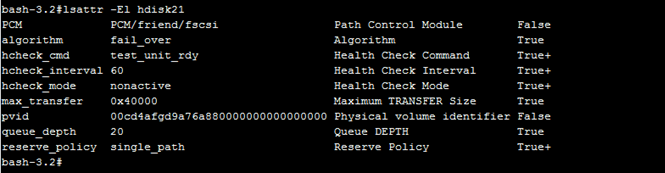
3. If we assign LUNS to any of the servers it will take the control as per SDD ( Storage Device Driver ) configuration. However, we have to allocate LUNs to client partition when client partition access disk I/O routed through VIOSERVER Fiber Channel. Also, we need to configure client LPAR to be able to switch access from one VIOSERVER to another VIOSERVER as incase of any issues or not able access disk from any VIOSERVER as we configured. The key parameter is disk locking , we must turn off locking for each disk. So that we need to turn locking off for each disk. That is reserve policy; by default reserve policy would be single path we have to change as no_reserve.
Check the disk attribute through lsattr command
Ex:- lsattr –El hdisk#
Or
lsdev -dev hdisk# -attr reserve_policy
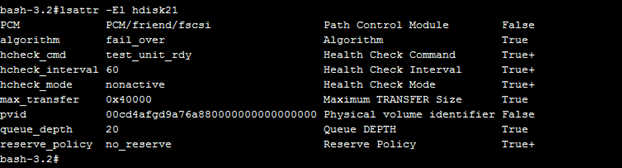
4. Change reserve policy ( turn off locking for each disk )
chdev -l hdisk10 -a reserve_policy=no_reserve
or
chdev -dev hdisk10 -attr reserve_policy=no_reserve

5. Validate the reserve policy status post change
6. Now create a Virtual Target Device ( vtd ) and assign to the appropriate client;
Syntax :-
$ mkvdev -vdev

Check the disk mapping through lsmap command to ensure that backing device is the right one.
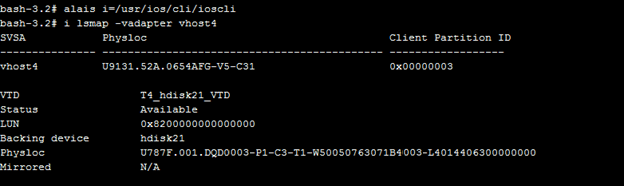
Note:- The above steps need to be followed from secondary vioserver.
7. Run cfgmr on client partition end to get the newly added disks.
8. Check through lspath command, to ensure the newly added disk got the two paths.
9. Check the PVID on vio client end and ensure that client partition PVID matching with VIOSERVER PVID (off course PVID would be the same).
10. In our case hdisk1 having paths through vscsi0, and vscsi1. To find out which VIO Server
Owning the vscsi (virtual scsi’s) , use lscfg | grep vscsi#

As per our VIOS configuration “C2” maps back to Remote Adapter 2 on vioserver1 .It
has been confirmed path “vscsi0” goes to vioserver1.
As per our VIOS configuration “C3” maps back to Remote Adapter 3 on vioserver2 .It
has been confirmed path “vscsi1” goes to vioserver2.
11. To check the priority for the both the vscsi (vscsi0 & vscsi1) for corresponding newly exported disks;
lspath -AHE -l hdisk## -p vscsi##
lspath -AHE -l hdisk## -p vscsi##
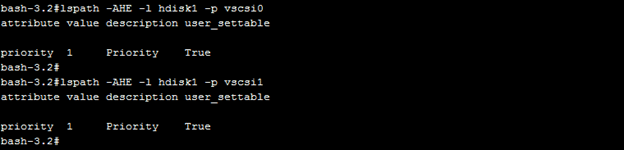
12. Both would be reporting a path priority as 1. We needs to make one of the two servers are the default pathway by changing the priority of the other to “2”. As per design , The lower of the priority numbers is the default.
Syntax :- chpath -l hdisk# -p vscsi# -a priority=2 -P
(-a for attribute , -p for path)

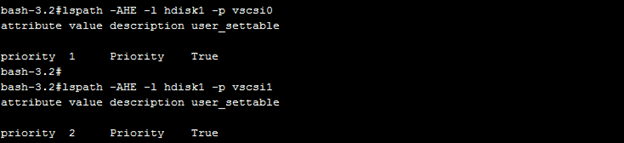
13. To validate the path change, run the below command;
lspath -AHE -l hdisk1 -p vscsi0
lspath -AHE -l hdisk1 -p vscsi1
14. Now you can start use the disk to create a volume group or can be used as RAW device.
Post Script:- Now MPIO disk mapping has been done, by using backing device a storage disk tunable can be applied as per the environment and design.